Pages

30 September 2013

#31dc2013 - Day 30: Inspired by a tutorial

Ever since the PP 2013 blogfest I have been dying to try out this tutorial for reverse stamping by Shatter me Claire. I love nail stamping so the notion of using it to create multicoloured decals was instantly intriguing. I flipped through my books of plates looking for a design that had large outlined spaces in them. I settled on this geometric print because its something I could never do freehand. Read on for a step by step tutorial that will change your life (if you love stamping that is!).


Today's design features:
  • Lime Crime- Pink Parfait
  • Lime Crime - Lavendairy
  • Lime Crime - Once in a blue mousse
  • Barry M - Black
  • Pueen plate - PUEEN08
Step 1: Paint 1 thickish layer of topcoat in nail size squares onto baking paper (wax paper, parchment paper). I used a felt pen to draw little squares so I could see where I had put the topcoat. Let your topcoat dry. I used Seche and I left it about 15 minutes.


Step 2: Apply your stamping polish onto your plate as normal, scrape then pick up the image on your stamper just like if you were going to stamp into your nails. Stamp onto the topcoat that you have previously applied to the baking paper. Now this is the part you really need to let dry. I left mine for an hour. 


Step 3: Fill in the blank parts of your design with your chosen colours. If you are doing little accent images you will need to think about the order that you "colour in" but with this print it didn't really matter. I did two coats of each colour. Let it dry for 15 minutes.  


Step 5: Gently peel your decals off the baking paper. Flip to see your awesome print!


Use tiny nail scissors to cut your pattern to the size of your nail. Apply a liberal amount of base coat to your nail then gently place your decal on your nail with tweezers. Gently push the decals down especially near the cuticle to get it to sit flat. Use your nail scissors to trim where necessary. If there are any bald spots or missing bits of your design you can use a small brush to tweak your image.

Wait a few minutes for the decal to settle then apply top coat to seal it down. You can also use your clean up brush dipped in nail polish remover to clean up the edges, your decal is only nail polish so it will gently rub off without a drama.


Those bubbles were from applying the coloured polish too thickly on the back of the stamped image, so make sure not to have blobs of polish when you "colour in" your stamp. 

It was relatively easy to do but it did require patience leaving each step to dry. It's worth it though because the results are really fantastic. I feel like Im wearing a nail wrap but I made it all by my lil ol' self...it's a custom nail wrap! Totally addicted to this new way of stamping...scampers off to find more platessssss!!! 

Thank you Shatter me Claire, your tutorial was a revelation!

29 September 2013

#31dc2013 - Day 29: Inspired by the supernatural

Spirited Away. The cutest supernatural creatures ever! If you have never seen Spirited Away you need to stop what you are doing and watch it immediately. It's genius. Where is my baaaaabbbbbbyyyy! 


Today's design features:

  • Emily de Molly - Sakura (glitter)
  • China Glaze - Recycle (grey)
  • China Glaze - Liquid Leather (black)
  • OPI - My boyfriend scales walls (off white)


I would be totally open to having soot balls in my house! The character with the mask is called No Face. Nearly at the end of the challenge now. Only 2 days to go! Hopefully you guys have been enjoying DQN's attempts this year. Until tomorrow....

28 September 2013

#31dc2013 - Day 28: Inspired by a flag

For such an awesome country Australia still has a lot of uptight backward thinkers representing us in the political arena. We are a long way off from marriage equality in Australia which is a real shame because I would like to think that the majority of Aussies are supportive. So until our politicians are brave enough to be forward thinkers; love who you want to love, and be happy with the one you're with.


Today's design features:
  • China Glaze - Hanging in the balance (blue)
  • OPI - Funky Dunky (purple)
  • OPI - Red my fortune cookie (red)
  • Zoya - Pippa (yellow)
  • Ulta - Kiwi kaos (green)
  • China Glaze - Japanese Koi Neon (orange)


27 September 2013

#31dc2013 - Day 27: Inspired by an artist

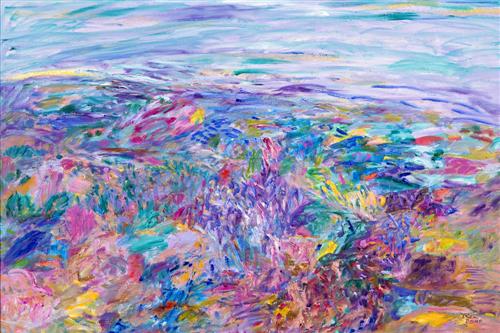
If you lived in Australia in the 80s chances are you know who Ken Done is. He was extremely popular in the 80s for his vibrant and childlike approach to landscapes and OTT Australiana paintings. I owned a hideous Ken Done jumper with a giant koala on it and at the time I thought I was pretty darn cool. I should have kept it, it's probably worth a mint these days! The painting I was inspired by is called Revelation 4 1988.


I used 8 different colours (neon pink, yellow, purple, magenta, candy pink, turquoise  jade and blue)  to create this look. I applied the polish by using the straight edge of a triangle make up sponge. I applied the colour to the edge of the sponge then let it dry for 5 minutes to create a hard "crusty" edge to the sponge. Then I dipped the sponge back into the colour and applied to the nail with a dabbing motion. 


The jewel tone colours in this painting and the random way they are put together is really beautiful. Until tomorrow....

26 September 2013

#31dc2013 - Day 26: Inspired by a pattern

When I think patterns I think stamping. I have so many plates so I thought I would pick a pattern I have never used and hopefully be inspired by it. I think this bow kite string design is so girly. It made me think of pink sparkles.


Today's design features:

  • Picture Polish - Candy (pink)
  • OPI - My boyfriend scales walls (off white)
  • China Glaze - Liquid Leather (black)
  • Konad specail stamping polish
  • Essie - Set in stones (silver glitter)
  • Pueen - 29


Can't think why I haven't used Essie - Set in stones for such a long time. I forgot how gorgeous it is. Until tomorrow...

25 September 2013

#31dc2013 - Day 25: Inspired by fashion

I wouldn't say I'm a fashionista but I do read fashion magazines and blogs every now and then. I love this day in the challenge because there are just so many amazing things you can do . I went trolling on the net to see the clothes from the latest collections of designers and I stumbled upon a fashion trend for Spring. Sea punk. Beautiful sea toned turquoise mixed with bold prints, a nautical theme and embellishments that play with a "light on the water" effect. 


Today's design features:

  • OPI - Can't find my czechbook
  • China Glaze - Hanging in the balance
  • OPi - My boyfriend scales walls
  • Lechat - Silver glitter striper

My inspiration came from the dress below by Monique Lhuillier . The way she has used the white to accentuate curves mixed with the floaty hemline and the mix of hard and soft. It's genius and gorgeous.

Spring Fashion 2013 Trend Seapunk Monique Lhuillier

I swirled the blue polishes together with a dotting tool to create a water effect. It was so pretty I didn't want to cover it up.


Only 6 more days of the challenge left, the end is in sight! Until tomorrow,,,

24 September 2013

#31dc2013 - Day 24: Inspired by a book

As I was sitting eating lunch with my husband today I asked him to give me some ideas for a book with a great cover that would translate well into nail art. He loves books and refers to them as "his old friends" so I knew he would pick something great. Straight away he said Clockwork Orange. He grabbed it off the bookshelf enquiring if I was going to use it for the challenge. I nodded and he flipped to a dog eared page and quoted "We can destroy what we have written, but we cannot unwrite it". Perfect!


Today's design features:

  • OPI - Neon Orange (I dont know what the actual name of this polish is sorry, it is really old and the label fell off long ago)
  • Lechat - White
  • Lechat - Black
  • Konad Special polish in white
  • OPI - Black Spotted
  • Glam Polish - Spot the difference


“What I do I do because I like to do.” Well said Anthony Burgess. Until tomorrow....

23 September 2013

#31dc2013 - Day 23: Inspired by a movie

It's 1985 and here I am just 6 years old in my pajamas at home watching Splash for the very first time. A mermaid? A real life mermaid? In the bath tub? I swear for a while I fully believed that it was possible to have a mermaid best friend to go along with my big 80's hair and Kylie Minogue cassette tapes. If you have never seen Splash do yourself a favour and get in your jammies with some popcorn and a drinky poos, pop it on and pretend you are a six year old with a magical mermaid bestie.


Today's designs features:

  • Color Club - Harp in it (silver holo)
  • Zoya - Kotori - (Blue glitter shimmer)
  • Zoya - Irene (lime duochrome shimmer)
  • Zoya - Akyra (Emerald green)
  • Glam Polish - Lost your marbles? (glitter topper)
  • OTD - Northern Lights (holo topcoat)


I swirled all the Zoya colours together on my nail by dripping random blobs of polish then using a small brush to drag the colours through each other. The scale stamp is from GALS Stamping Plate:GA14. The mermaid stamp is from the Winstonia Collection. I was racing against the setting sun to get this photographed because I wanted to show the gorgeous holo in all it's glory, so rainbowie! Until tomorrow.....

22 September 2013

#31dc2013 - Day 22: Inspired by a song

Only 5 more sleeps until I get to see one of my fav girl crushes in the flesh...Rihanna! It was only fitting that I chose one of her songs for this year's challenge. Shine bright, tonight, you and I, we're beautiful like diamonds in the sky!


Today's design features:

  • Barry M - Black
  • Zoya - Trixie
  • Barry M - Silver foil


The stamp is from the first Bundle Monster set - BM09. I wonder how hard those rhinestones are going to be to get off? This is so posh, I just love it! Until tomorrow....

21 September 2013

#31dc2013 - Day 21: Inspired by a colour

As the end of the challenge draws nearer its safe to say the real challenge still lies ahead. These next 10 days require out of the box thinking with manis inspired by songs, colours, art and books. Thank goodness I'm on holidays so that I can really put my thinking cap on. Although when it comes to picking a colour I'm inspired by, that was a  no brainer...purple!


Today's design features:

  • Barry M Gelly - Prickly Pear (Lavender)
  • OPI - Funky Dunky (purple)
  • Zoya - Miley (sheer lilac)
  • OPI - My boyfriend scales walls (off white)
  • To create the ombre colours I mixed Funky Dunky and Boyfriend in different ratios.


 You dont need to have a tonne of different purples to create an ombre, just mix your own colours from what you have in your polish stash. That way you keep the same tone to the colours and can achieve that gradual change in saturation. I started with a base of Miley, then added the striping tape. I then used a small brush to fill in each colour. I worked from the tips down. I did the tips of all my nails with Funky Dunky, then moved to the next colour. I didn't do each finger one at a time because I needed to work fast with the colours that I had mixed. The ring finger was created by blobbing a few different purples on my nail then swirling them around with a small brush to create a watercolour effect. Until tomorrow.....

20 September 2013

#31dc2013 - Day 20: Watermarble

So today is the day....its time for the dreaded water marble. I say dreaded because there only seems to be 2 outcomes when trying to marble: it either works or its a complete disaster/epic fail! After an hour of trying to find polishes that worked well together in the water, I then spent another half an hour trying to find a pattern that I liked and was a bit different from the normal "flower" design. And this is the result. The art deco water marble.


Today's design features:

  • BC- Shade 8 (peach)
  • Gloss n' Sparkle - Spectraflair topcoat
  • Color Club - Beyond (Black Holo)


I breathed a huge sigh of relief when this mani was finished. Jules will tell you...there was raging and swearing and Drama Queen meltdowns. But it was worth it in the end, they came out so beautiful and I'm proud of myself....and they are sparkly, winning! Until tomorrow..........

19 September 2013

#31dc2013 - Day 19: Galaxy Nails

Galaxy......drrrrrip! These are inspired by the amazing @Coewless  She did a gorgeous aqua version about a year ago and it was such a great idea to turn the original galaxy into the drip version. It was surprisingly easy and I am super happy with how they turned out considering I have never tried the drip technique. I think they are pretty realistic of a galaxy far far away....the bling galaxy obviously!


Today's design features:
  • Zoya - Storm - You absolutely need this polish in your life OMG so sparkly!
  • Barry M - Navy
  • Orly - Pink Waterfall
  • BC - Shade 12 (Sky blue)
  • OPI - My boyfriend scales walls
  • Canmake - 9062 (a flaky silver glitter topper I got in Japan)


I started with 2 coats of My boyfriend scales walls (white). I then used a large dotting tool and Zoya Storm to create the black drips and fill in the tip of my nail. I used a sponge to create the galaxy as normal. There is Youtube video for a galaxy how to here. I really love these nails and wish I didn't have to take them off to create day 20, the dreaded water marble....wish me luck! Until tomorrow....

18 September 2013

#31dc2013 - Day 18: Half Moons

Half moons....eh? A design that was popular in the 30s and 40s has made a comeback in the past 5 years thanks to celebrities like Dita Von Teese and Rihanna. Originally the half moon manicure was where you left the moon shape at the base of your nail bare and polished from above the moon line to the tip of your nail. Women liked the design as it allowed you to go for longer periods between manicures as you reduced the unsightly "regrowth" polish line near your cuticles.


Moving into the 40s the design shifted a little to include a French tip as well as the bare moon shape. Usually done in sultry colours like red, maroon and navy, think old Hollywood glamour. Recently the trend has morphed to include painting the moon shape in opposing colours instead of leaving it bare. I thought I would change it up again and create the bling half moon. The above picture was taken in direct sunlight.

Today's design features:

  • OPI - I Theodora you
  • China Glaze - For Audrey


This picture was taken with a flash. I think it's a really pretty combo. If did however take an hour or so to hand place the glequins...but they are worth the sparkly effort! And yes I broke my thumb nail....of course right in the middle of the challenge, waaaaah! Until tomorrow.....

17 September 2013

#31dc2013 - Day 17: Glitter

A quick one today...this is Glam Polish - Fairy Princess.


A delicious glitter topper suspended in a clear base. 


Until tomorrow.....

16 September 2013

#31dc2013 - Day 16:Tribal Nails

Tribal print! I mustered all my tiny brush powers to attempt to create something resembling tribal nails. I'm not a huge fan of tribal print nails, they are so OTT! So today's design was something I had never attempted and honestly it was a bit tricky but I did my best. 


Today's design features:
  • China Glaze - Flip Flop Fantasy (neon coral)
  • OPI - Neon Yellow
  • OPI - Dont pretzel my buttons (nude)
  • Lechat - Black


I used striping brushes and a tiny filler brush to colour in each area. It was time consuming and rage inducing! Until tomorrow....

15 September 2013

#31dc2013 - Day 15: Delicate Print

Julsie tag! It's day 15 of the challenge and today its all about delicate girly patterns. A beautiful dotticure from my wonderful sis. Thank goodness for teamwork. These are so cute and fun!


Today's design features:
  • OPI - My byfreind scales walls
  • Lime Crime - Lavendary


To recreate this design use varying sizes of dotting tools and work by adding semi circles of dots around a central large dot. Pretty! Until tomorrow....

14 September 2013

#31dc2013 - Day 14: Flowers

Julsie Tag! A super simple flower mani for day 14 using decals that we got for free with a Shick razor. It was really late at night and there may have been some drinking involved but poor Julsie tried to stamp her ring finger 3 times with this design and the white polish underneath just wouldn't dry and kept smudging. So to avoid a Drama Queen meltdown it was decals to the rescue.


Today's design features:
  • Picture Polish - Heavy Metal
  • Zoya - Chyna (red pixie)


Until tomorrow........

13 September 2013

#31dc2013 - Day 13: Animal print

Urg! Hot mess! This was a very late night effort, obviously it was past my bedtime. Day 13 is all about animal print and I wanted to do something out of the box because I love leopard print and do it all the time. So I thought Id be a smarty pants and do something unusual like a bird. These were supposed to be peacock nails but the purple polish I used in the gradient bled into the stamping and ruined it. Sadface! But the pinkie...should have done that on every finger!! It's beautiful.


Today's design features:
  • Kleancolors - Metallic Purple
  • Kleancolors - Metallic Aqua
  • China Glaze - Running in circles
  • Barry M - Gold Foil

The peacock print is from the 2nd Bundle Monster kit and the feathers are from Nail Craze NC01. I think the little heart gems helped to pull this shambles design together in the end. Sparkle Power! Until tomorrow....


12 September 2013

#31dc2013 - Day 12: Stripes

You all know I love a good stripe! My striping brush is the most used tool in my nail art kit. I really wanted to recreate my striped mani from last year but didn't want to seem like I was cheating so I took the same colours and mixed it up instead. This design is called a waterfall mani and I used a really thin striping brush to achieve these fine tapered lines. 


Today's design features:
  • OPI - Skull and Glossbones (grey)
  • Lechat - Hot Pink
  • China Glaze - Liquid Leather (black)
  • China Glaze - White on White
  • Zoya - Dahlia (charcoal pixie)

I wasn't overly fussed with this mani at first but I grew to like it, especially the thumb. Below is the design I did last year which I really loved and have done a couple of times again since then. Check out the difference in my nail length and shape! Thanks to Duri my nails have never looked better! Until tomorrow.....


11 September 2013

#31dc2013 - Day 11: Polka Dots

For day 11 of the challenge I wanted to steer away from the usual polka dot designs and try something different.  I'm not too sure what you would call this, fish eyes, triple dots? I can't say that I love today's nails but its always good to try new things!


Todays design features:

  • China Glaze - Liquid Leather (black)
  • BC Co. - Shade 19 (Jade)
  • Le Chat - Hot Pink
  • China Glaze - White on white 


To recreate this look just use a big dotting tool to make your first set of dots. What for that layer to dry then use a smaller dotting tool to add you next colour. Wait again then use a super small dotting tool for the final layer of dots. Make sure you wait at least 5-10 min for the dots to be completely dry or they will streak when you apply topcoat. It's like a hundred beady eyes are following me! Until tomorrow........

10 September 2013

#31dc2013 - Day 10: Gradient

10 straight days of new nail art! Loving the challenge this year, its so much fun the 2nd time around. Today's theme is gradient nails. I enjoy doing gradient nails, it was one of the first techniques that I tried when I started experimenting with nail art. Gradients are so pretty and the design has morphed into many forms; the original two colour gradient, 3 colour gradient, glitter gradient, reverse glitter gradient, the vertical gradient and the gradient dotticure just to name a few.


Today's design features:

  • Picture Polish - Hot Lips (neon pink)
  • Lime Crime - Pink Parfait (lighter pink on index finger)
  • Petia's Polish - Musk Sticks (glitterbomb) 


The stamp is from the Winstonia collection which is available here. I stamped using Konad white then used a small brush to add some Musk Sticks over the top. Arrgh the gorgeousness of Musk Sticks is just too much! 

For the gradient nail this is the technique that I used. I did this tutorial ages ago but thought I would share again because it works really well mixing the colours beforehand, You get a much subtler effect versus painting the polish straight onto the sponge which can result in a "liney" gradient instead of a nice faded look.


I love reading all your comments so please keep sending them my way. Until tomorrow...........