Showing posts with label nail art challenge. Show all posts

31 August 2014

#31dc2014 - How to conquer the challenge!

With all the new exciting stock we have been getting in at DQN over the past few months, Jules and I have been so busy packing orders and sending goodies on their way that the 31 day nail art challenge almost snuck up on us! Luckily in the knick of time that familiar anxious feeling rolled around as if on cue to remind and make us question....seriously, are we going to take this on again? We must be bonkers! 31 days, 31 new nail designs....dear nail gods please give us the strength to be creative and may our cuticles endure! 


The challenge starts on Monday 1st September 2014 and continues for the whole month. Please check in on our social media sites to cheer us on, we will need the encouragement. This will be the third year that we have done the challenge.

Here are some REAL tips for those thinking about doing the challenge:

  1. You CAN do it! Really...you can! You will be so proud of yourself when you are done, its a real achievement! 
  2. It's perfectly OK to just paint one hand. Bah! Ain't NO shame in that! Match your other hand to the colour scheme of your nail art hand, or carry your design over with an accent nail on your non dominant hand. 
  3. Prepare yourself. Clean up your nail art desk, put all your polishes away, clean your brushes and tools, restock your remover pads, refill your nail polish remover pump. You need to be a nail art machine so get your work space ready for the challenge.
  4. Thin or Restore your top coat and refill the bottle. It just makes sense people, you need your topcoat to help you! I will be using Seche mostly. I use Zoya Anchor as a base these days. 
  5. Repeat this step for your fav black and white base polish, thin or restore them so they are in prime condition, they will come in handy.
  6. Using a gorgeous feature polish, think chunky glitter jellies (EDM - Cosmic Forces) or sparkly textures (Pixies/Liquid Sands) is a GREAT way to add colour elements if you are running short of time, but don't go crazy, you will need time to remove that chunky glitter the next day. Accent nail!
  7. Troll through your own nail art pics, your IG likes, Tumblr likes, nail art mags, google etc to start writing a loose plan. I look for workable nail art colour combos and my stamping plates. Stamping plates are a great source of inspo. For example, see a dinosaur stamp...dinos are green....green day sorted! My list is really simple, just an idea and I draw one nail to remind myself what I was going for. 
  8. Your house will be a complete disaster by the end of the challenge. Laundry piled high, dishes in the sink. Whatevs! 
  9. If you start crying over failed nail art at any point throughout the challenge you are not alone. It's going to be ok. I cry on water marble day...every year!

The above pic is a little sample of our designs from last year. For the full 2013 round up, check out our 2013 attempt. And our first ever go 2012.

Some of my best work has come out of this challenge so whilst its daunting and will push you, its really rewarding, especially when you look back over the month and see all your art together and the amount you grow each year. 


To join in the challenge just follow the schedule above and post your pics to social media with the hashtag #31dc2014 Thanks again to Sarah from Chalkboard Nails who each year encourages us all and makes lovely pictures for us to share.  Best of luck to everyone joining in on the challenge xx

get the InLinkz code

3 October 2013

#31dc2013 - The Round-up Post

Let's take a look back at all the creations from this year's challenge. 


Montage! Gunna need a montage! 


Day 1 Red


Day 2 Orange


Day 3 Yellow

Day 4 Green


Day 5 Blue - I really loved this mani and was sad that I had to take it off the next day, it was really beautiful.


Day 6 Purple - Loved this one too and will be doing lots more ombre claws in the future.


Day 7 Black and White - Jules tapped in for this one. Funky!


Day 8 Metallic


Day 9 Rainbows. My addiction to Zoya Pixies was full blown by this stage.


Day 10 Gradient, which I personally think should be replaced with unicorn day next year.


Day 11 Spots


Day 12 Stripes


Day 13 Animal print: Peacock. I was raging on this day because my stamping bled into colour underneath when I applied topcoat but with perspective it was still nice.


Day 14 Flowers. Julsie helped out with next 2 days so I could have a break. Isn't she the best sis ever!


Day 15 Delicate Print


Day 16 Aztec


Day 17 Glitter


Day 18 Half moon


Day 19 Galaxy


Day 20 Watermarble Aargh! This day does NOT get any easier the 2nd time around. I am convinced that living in QLD with our high humidity and temps does make it difficult to get the polish to spread well. Perhaps it's just me?


Day 21 Inspired by a colour


Day 22 Inspired by a song: Rihanna Diamonds.


Day 23 Inspired by a movie: Splash!


Day 24 Inspired by a book: Clockwork Orange


Day 25 Inspired by fashion


Day 26 Inspired by a print


Day 27 Inspired by an artist: Ken Done


Day 28 Inspired by a flag: Pride flag


Day 29 Inspired by the supernatural


Day 30 Inspired by a tutorial: Reverse stamping


Day 31 Honour someone you admire: Chalkboard Nails


That's a wrap! 


2 October 2013

#31dc2013 - Day 31: Honour someone you admire


It's finally here! The last day of the challenge. It's been a tough month with what felt like deadlines looming everyday. But while it was demanding I am so happy with all of the designs that I produced this year. I have improved so much from my 2012 attempt and also got to try some techniques I have never done before. All around it's been a super huge fun month of nails, nails, nails! And more nails! And then some more nails! 


The last day of the challenge is all about honouring a mani from someone in the nail art world that you admire. When I first started taking nail art seriously there were five girls that I closely followed; Mr Candiipants, Simple Little Pleasues, Nailside, The Nailasuarus and Chalkboard Nails. A week or so ago the one and only Chalkboard Nails followed me on Instagram. I have to admit that I felt just a little bit accomplished, having one of my heroes acknowledging that my nails warranted a look in. I knew straight away which CN mani that I wanted to honour, the Beauty and the Beach design...breathtaking! Thank you so much CN for all that you have shared and created, it has inspired many people, me included. To see Sarah's original design which includes a great tutorial click here.

Today's design features:

  • Essie - Sand Tropez (Sand/Nude)
  • China Glaze - For Audrey (turquoise)
  • OPI - My boyfriend scales walls (off white)
  • Barry M - Black
And now I can resume my normal life! I'm freeeeeeeeee! 

30 September 2013

#31dc2013 - Day 30: Inspired by a tutorial

Ever since the PP 2013 blogfest I have been dying to try out this tutorial for reverse stamping by Shatter me Claire. I love nail stamping so the notion of using it to create multicoloured decals was instantly intriguing. I flipped through my books of plates looking for a design that had large outlined spaces in them. I settled on this geometric print because its something I could never do freehand. Read on for a step by step tutorial that will change your life (if you love stamping that is!).


Today's design features:
  • Lime Crime- Pink Parfait
  • Lime Crime - Lavendairy
  • Lime Crime - Once in a blue mousse
  • Barry M - Black
  • Pueen plate - PUEEN08
Step 1: Paint 1 thickish layer of topcoat in nail size squares onto baking paper (wax paper, parchment paper). I used a felt pen to draw little squares so I could see where I had put the topcoat. Let your topcoat dry. I used Seche and I left it about 15 minutes.


Step 2: Apply your stamping polish onto your plate as normal, scrape then pick up the image on your stamper just like if you were going to stamp into your nails. Stamp onto the topcoat that you have previously applied to the baking paper. Now this is the part you really need to let dry. I left mine for an hour. 


Step 3: Fill in the blank parts of your design with your chosen colours. If you are doing little accent images you will need to think about the order that you "colour in" but with this print it didn't really matter. I did two coats of each colour. Let it dry for 15 minutes.  


Step 5: Gently peel your decals off the baking paper. Flip to see your awesome print!


Use tiny nail scissors to cut your pattern to the size of your nail. Apply a liberal amount of base coat to your nail then gently place your decal on your nail with tweezers. Gently push the decals down especially near the cuticle to get it to sit flat. Use your nail scissors to trim where necessary. If there are any bald spots or missing bits of your design you can use a small brush to tweak your image.

Wait a few minutes for the decal to settle then apply top coat to seal it down. You can also use your clean up brush dipped in nail polish remover to clean up the edges, your decal is only nail polish so it will gently rub off without a drama.


Those bubbles were from applying the coloured polish too thickly on the back of the stamped image, so make sure not to have blobs of polish when you "colour in" your stamp. 

It was relatively easy to do but it did require patience leaving each step to dry. It's worth it though because the results are really fantastic. I feel like Im wearing a nail wrap but I made it all by my lil ol' self...it's a custom nail wrap! Totally addicted to this new way of stamping...scampers off to find more platessssss!!! 

Thank you Shatter me Claire, your tutorial was a revelation!

29 September 2013

#31dc2013 - Day 29: Inspired by the supernatural

Spirited Away. The cutest supernatural creatures ever! If you have never seen Spirited Away you need to stop what you are doing and watch it immediately. It's genius. Where is my baaaaabbbbbbyyyy! 


Today's design features:

  • Emily de Molly - Sakura (glitter)
  • China Glaze - Recycle (grey)
  • China Glaze - Liquid Leather (black)
  • OPI - My boyfriend scales walls (off white)


I would be totally open to having soot balls in my house! The character with the mask is called No Face. Nearly at the end of the challenge now. Only 2 days to go! Hopefully you guys have been enjoying DQN's attempts this year. Until tomorrow....

28 September 2013

#31dc2013 - Day 28: Inspired by a flag

For such an awesome country Australia still has a lot of uptight backward thinkers representing us in the political arena. We are a long way off from marriage equality in Australia which is a real shame because I would like to think that the majority of Aussies are supportive. So until our politicians are brave enough to be forward thinkers; love who you want to love, and be happy with the one you're with.


Today's design features:
  • China Glaze - Hanging in the balance (blue)
  • OPI - Funky Dunky (purple)
  • OPI - Red my fortune cookie (red)
  • Zoya - Pippa (yellow)
  • Ulta - Kiwi kaos (green)
  • China Glaze - Japanese Koi Neon (orange)


27 September 2013

#31dc2013 - Day 27: Inspired by an artist

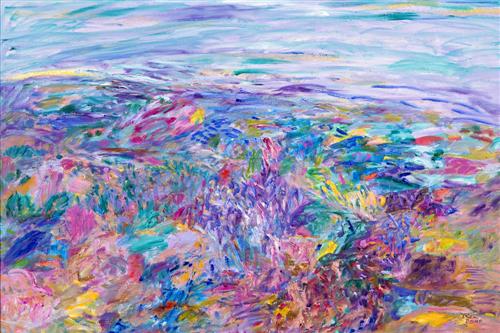
If you lived in Australia in the 80s chances are you know who Ken Done is. He was extremely popular in the 80s for his vibrant and childlike approach to landscapes and OTT Australiana paintings. I owned a hideous Ken Done jumper with a giant koala on it and at the time I thought I was pretty darn cool. I should have kept it, it's probably worth a mint these days! The painting I was inspired by is called Revelation 4 1988.


I used 8 different colours (neon pink, yellow, purple, magenta, candy pink, turquoise  jade and blue)  to create this look. I applied the polish by using the straight edge of a triangle make up sponge. I applied the colour to the edge of the sponge then let it dry for 5 minutes to create a hard "crusty" edge to the sponge. Then I dipped the sponge back into the colour and applied to the nail with a dabbing motion. 


The jewel tone colours in this painting and the random way they are put together is really beautiful. Until tomorrow....

LinkWithin

Related Posts Plugin for WordPress, Blogger...